
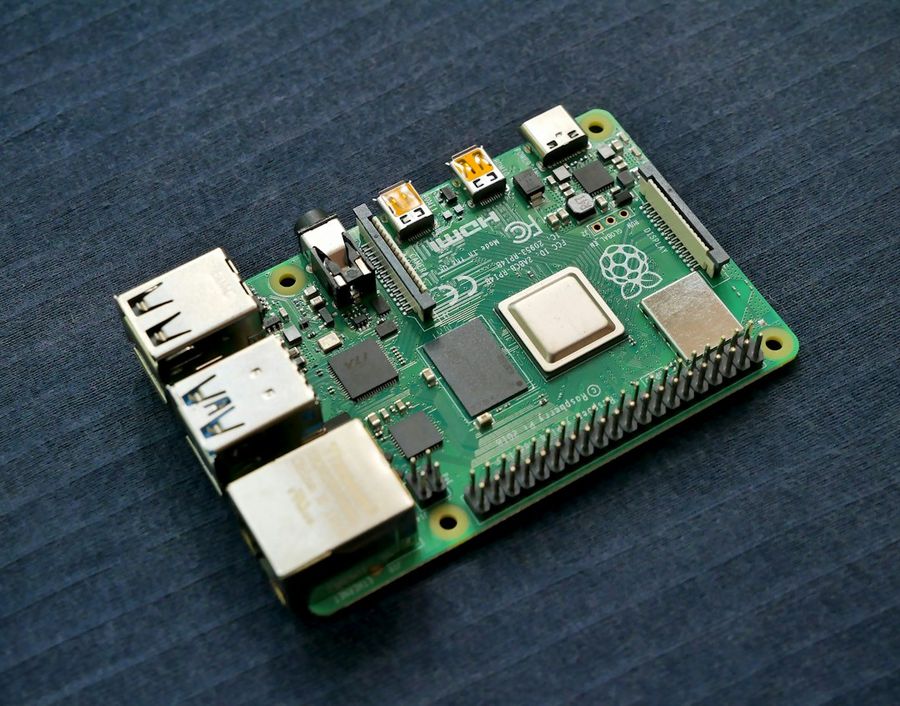
In an age where streaming, backups, and personal cloud services dominate our digital lives, having a reliable Network‑Attached Storage (NAS) at home is no longer a luxury—it’s a necessity. While commercial NAS units can cost hundreds of dollars, a Raspberry Pi paired with OpenMediaVault (OMV) offers a cost‑effective, flexible, and surprisingly powerful alternative. This guide walks you through every step, from hardware selection to final configuration, ensuring you end up with a rock‑solid home NAS that you can expand and customize for years to come.
What You’ll Need
- Raspberry Pi 4 Model B (4 GB or 8 GB RAM recommended)
- Official Raspberry Pi 4 power supply (5 V / 3 A USB‑C)
- Micro‑SD card (32 GB + Class 10) or a USB‑SSD for the OS
- External USB 3.0 hard drives or SSDs (minimum 2 TB total storage)
- USB‑C to USB‑A adapter or powered USB 3.0 hub (to avoid power drop)
- Ethernet cable (Cat 6) for wired network connection
- Keyboard, mouse, and HDMI monitor (or headless setup via SSH)
- Micro‑SD card reader for flashing the OS
Step 1: Prepare the Raspberry Pi OS
Start by downloading the latest Raspberry Pi OS (Lite) image. We recommend the Lite version because it’s headless and consumes minimal resources, leaving more RAM for OMV services. Use balenaEtcher (or dd on Linux/macOS) to flash the image onto your micro‑SD card:
sudo dd if=2024-05-raspios-lite-arm64.img of=/dev/sdX bs=4M status=progress conv=fsyncAfter flashing, mount the boot partition and enable SSH and Wi‑Fi (if needed) by creating an empty file named ssh and editing wpa_supplicant.conf. For a wired connection, simply plug the Ethernet cable—no extra config required.
Step 2: Boot and Secure the Pi
Insert the micro‑SD card, connect the power supply, and wait for the Pi to boot. Log in via SSH (default credentials: pi/raspberry) and immediately change the default password:
passwdNext, update the system and install essential packages:
sudo apt update && sudo apt full-upgrade -y
sudo apt install -y curl gnupg2 lsb-release
Enable the raspi-config tool to expand the filesystem and set the correct locale and timezone:
sudo raspi-configNavigate to System Options → Expand Filesystem, then Localisation Options → Locale, Timezone, and Keyboard. Reboot when prompted.
Step 3: Install OpenMediaVault
OpenMediaVault isn’t available in the default Raspberry Pi repositories, but the developers provide a one‑liner installer that handles dependencies and configuration automatically. Run the following command:
curl -L https://github.com/OpenMediaVault-Plugin-Developers/installScript/raw/master/install | sudo bashThe script will download OMV, install required services (Apache, PHP, MariaDB, etc.), and reboot the Pi. This process can take 10‑15 minutes depending on your internet speed.
After reboot, OMV’s web interface is reachable at http://pi‑ip‑address/. Log in with the default credentials (admin/openmediavault) and immediately change the password under General Settings → Web Administration → Change password.
Step 4: Attach and Mount Your Storage Drives
Power your external drives via a powered USB 3.0 hub to prevent voltage sag. Plug them in, then head to Storage → Disks in the OMV UI. You should see each drive listed (e.g., /dev/sda, /dev/sdb). For each drive:
- Select the disk and click Wipe → choose
Quick(orSecureif you want to erase data). - After wiping, click Create → select
ext4as the filesystem. - Give the filesystem a meaningful label (e.g.,
NAS_DATA).
Once formatted, go to Storage → File Systems, select the new filesystem, and click Mount. Set the mount point to /srv/dev-disk-by-label-NAS_DATA (OMV will auto‑generate the path). Repeat for each drive you plan to use.
Step 5: Configure Shared Folders and Access Protocols
Now that the disks are mounted, create shared folders that clients will see. Navigate to Access Rights Management → Shared Folders and click Add:
- Name:
Media - Device:
/srv/dev-disk-by-label-NAS_DATA - Path:
media(OMV will create/srv/dev-disk-by-label-NAS_DATA/media) - Permissions: Set owner to
adminand group tousers, then chooseRead/Writefor the group.
Enable the protocols you need under Services:
- SMB/CIFS: Turn on, then go to SMB/CIFS → Shares and add the
Mediafolder. SetBrowseableandGuest accessaccording to your security model. - FTP: Enable if you need legacy FTP access; otherwise, stick with SMB or NFS.
- NFS: Useful for Linux/macOS clients. Add an NFS share pointing to the same folder and define the client network (e.g.,
192.168.1.0/24).
Apply the changes and test connectivity from a workstation: on Windows, open pi‑ip‑address in File Explorer; on macOS/Linux, mount via mount -t nfs or smbclient.
Step 6: Set Up Automated Backups and Snapshots
Data integrity is the core reason for a NAS. OMV offers the openmediavault‑rsnapshot plugin for scheduled snapshots and openmediavault‑backup for remote backups. Install them via System → Plugins → Install:
sudo apt install openmediavault-omvextrasorg
sudo omvextrasrepo install openmediavault-rsnapshot
sudo omvextrasrepo install openmediavault-backup
After installation, configure rsnapshot to take hourly snapshots of the Media folder, retaining 24 hourly, 7 daily, and 4 weekly copies. For remote backup, point the plugin to a second Raspberry Pi or a cloud bucket using rclone as the backend.
Step 7: Optimize Performance and Power Settings
Raspberry Pi 4’s USB 3.0 ports can deliver up to 1.2 GB/s, but the CPU can become a bottleneck under heavy I/O. Apply these tweaks:
- Increase swap size: Edit
/etc/dphys-swapfileand setCONF_SWAPSIZE=1024(or larger if you have ample SD space). Then runsudo systemctl restart dphys-swapfile. - Enable USB boot: If you prefer an SSD as the primary OS, add
dtoverlay=sdcardto/boot/config.txtand follow the Raspberry Pi USB boot guide. - Disable HDMI output (headless): Add
hdmi_blanking=2to/boot/config.txtto shave a few watts. - Set CPU governor to performance:
sudo apt install cpufrequtils && echo 'GOVERNOR="performance"' | sudo tee /etc/default/cpufrequtils && sudo systemctl restart cpufrequtils.
These adjustments keep the Pi responsive during large file transfers and reduce the chance of thermal throttling.
Step 8: Secure Your NAS
Security is often overlooked in hobby projects, but a NAS is an attractive target. Follow these best practices:
- Change the default SSH port: Edit
/etc/ssh/sshd_configand setPort 2222. Restart withsudo systemctl restart ssh. - Enable firewall: Install
ufwand allow only necessary ports.
sudo apt install ufw
sudo ufw allow 22/tcp   # if you kept default SSH
sudo ufw allow 80/tcp   # OMV web UI
sudo ufw allow 443/tcp  # optional HTTPS
sudo ufw allow 445/tcp  # SMB
sudo ufw enableHTTPS under General Settings → Web Administration.Finally, schedule regular updates:
sudo apt update && sudo apt upgrade -yConsider enabling unattended upgrades for critical security patches.
Common Mistakes to Avoid
Even seasoned makers stumble on a few pitfalls:
- Power starvation: Plugging multiple HDDs directly into the Pi without a powered hub leads to random reboots.
- Using a low‑quality SD card: The OS drive is the single point of failure. Opt for a high‑endurance card or an SSD.
- Skipping filesystem checks: After a sudden power loss, ext4 may need a
fsck. Schedule periodic checks in OMV. - Leaving default credentials: Attackers scan for
admin/openmediavault. Change passwords immediately. - Overlooking network speed: A 100 Mbps switch will bottleneck your NAS. Use gigabit Ethernet throughout.
Tips and Tricks
Take your NAS from functional to fantastic with these extras:
- Docker support: OMV‑extras includes a Docker plugin. Run containers like
piholeornextclouddirectly on your NAS. - RAID via mdadm: If you have multiple drives, configure a software RAID 1 or 5 for redundancy.
- Smart monitoring: Install
smartmontoolsand enable SMART checks in OMV to get early warnings on drive health. - Remote access: Set up a VPN (WireGuard) on the Pi and tunnel SMB traffic securely when you’re away from home.
- Custom scripts: Use
cronto runrsyncjobs that mirror specific folders to an off‑site backup.
Frequently Asked Questions
Can I run the NAS headless without a monitor?
Absolutely. After the initial setup, you can manage everything via the OMV web UI or SSH. Just ensure SSH is enabled and you know the Pi’s IP address (check your router or use arp -a).
Will the Raspberry Pi 4 handle 4 K video streaming?
Yes, the Pi 4’s hardware decoder can stream multiple 4 K files simultaneously over SMB, provided the network is gigabit and the drives are fast enough (USB‑SSD is ideal).
How much storage can I attach?
Technically, the Pi’s USB bus can handle up to 127 devices, but power and bandwidth become limiting factors. A practical setup uses 2‑4 drives on a powered hub, each 2‑8 TB, giving you 4‑32 TB of usable space.
Conclusion
Building a home NAS with a Raspberry Pi and OpenMediaVault blends affordability with flexibility. By following this guide, you’ll have a secure, high‑performance storage hub that can serve media, backups, and personal cloud services to every device in your household. Remember to keep the system updated, monitor drive health, and back up critical data to an off‑site location. With a little maintenance, your Pi‑NAS will keep your digital life organized and accessible for years to come.
Photo by Vishnu Mohanan on Unsplash


