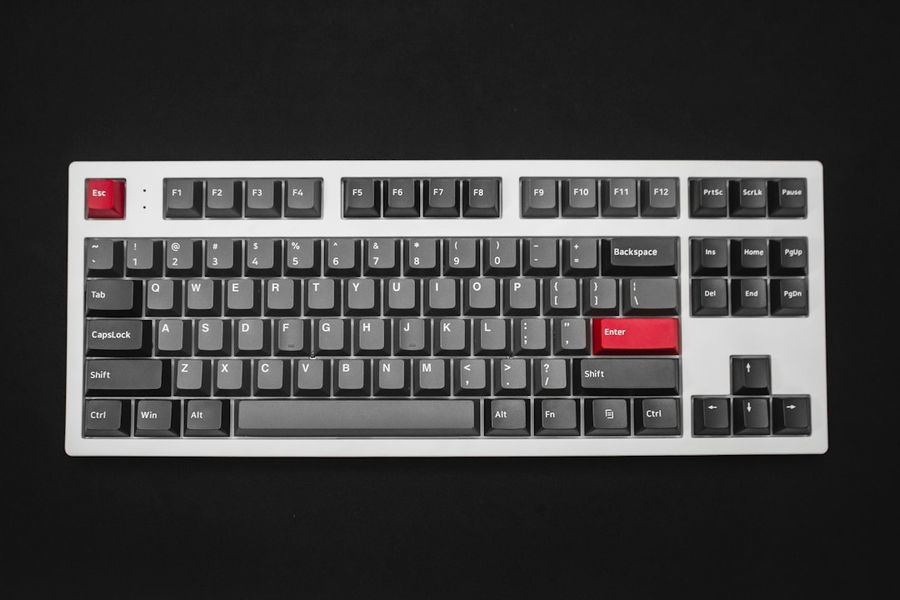
Imagine the satisfaction of typing on a keyboard that looks, feels, and sounds exactly the way you want. Building a custom mechanical keyboard from scratch might sound like a project for seasoned makers, but with the right guidance it’s perfectly doable for beginners. In this guide we’ll walk you through every stage—from planning your layout to flashing firmware—so you can end up with a truly personal typing experience.
What You’ll Need
- Keyboard case (plastic, aluminum, or 3D‑printed)
- PCB (printed circuit board) that matches your layout
- Switches (Cherry MX, Gateron, Kailh, etc.) – 60‑100 pcs depending on size
- Keycaps (compatible with your switch type)
- Soldering iron (30‑60 W) with fine tip
- Solder (lead‑free rosin core)
- Desoldering pump or braid (for mistakes)
- Wire cutters / side cutters
- Phillips screwdriver set
- USB‑C or micro‑USB cable (for flashing)
- Computer with QMK Toolbox or VIA software installed
- Optional: stabilizers (Cherry or Costar) for larger keys
Step 1: Design Your Layout
Before any hardware touches the bench, decide on the size and key arrangement. Popular beginner layouts are 60%, 65%, and TKL (tenkeyless). Use an online layout editor like Keyboard Layout Editor (KLE) to drag‑and‑drop keys, assign layers, and export a JSON file. Save the file; you’ll need it later when programming the firmware.
Step 2: Gather Components
Order your parts from reputable vendors (KBDfans, Drop, NovelKeys). Double‑check that the PCB matches the layout you designed—mistmatched footprints cause missing keys. When the parts arrive, lay everything out on a clean surface: case, PCB, switches, stabilizers, and keycaps. This visual check helps you spot any missing pieces before you start soldering.
Step 3: Prepare the PCB and Stabilizers
Insert stabilizers into the larger key slots (Enter, Shift, Space, etc.). Most PCB designs use plate‑mounted stabilizers; press them firmly until you hear a click. If your board uses PCB‑mounted stabilizers, insert the clips first, then snap the stabilizer housing onto them. Apply a thin dab of solder to each stabilizer pin to secure them—this prevents movement during switch insertion.
Step 4: Populate Switches
Take each switch and align its pins with the corresponding holes on the PCB. Gently push the switch down until the metal legs snap through the holes. A good trick is to work row‑by‑row to keep the board organized. Once all switches are in place, give the board a gentle shake; no switch should wobble.
Step 5: Solder the Switches
Heat your soldering iron to about 350 °C (660 °F). Tin the tip with a little solder to improve heat transfer. Place the iron tip on a switch pin for 1‑2 seconds, then feed a small amount of solder (about 1 mm length) onto the joint. Remove the iron and let the joint cool— it should form a shiny, cone‑shaped fillet. Repeat for every pin. If you see a cold joint (dull, grainy), re‑heat and add a touch more solder.
Step 6: Flash the Firmware
With the hardware assembled, it’s time to give the keyboard a brain. We’ll use QMK, the most popular open‑source firmware.
1. Download the QMK Toolbox from GitHub and install it.
2. Clone the QMK firmware repo (you need Git):
git clone https://github.com/qmk/qmk_firmware.git
3. Navigate to the keyboards folder that matches your PCB, e.g., cd qmk_firmware/keyboards/your_board.
4. Compile the default keymap (replace your_board and your_keymap accordingly):
qmk compile -kb your_board -km default
5. Put the keyboard into bootloader mode—usually by holding the reset button on the PCB or shorting the reset pins.
6. Open QMK Toolbox, select the compiled .hex file, choose the correct COM port, and click “Flash”.
If the flash succeeds, your keyboard will light up (if it has LEDs) and be recognized as a HID device.
Step 7: Program Your Keymap
Open the keymap.c file in the keymaps/default folder. Use the KLE JSON you exported earlier to map keys. Here’s a simple example for a 60% layout:
#include QMK_KEYBOARD_H

const uint16_t PROGMEM keymaps[][MATRIX_ROWS][MATRIX_COLS] = {
  [0] = LAYOUT_60_ansi(
    KC_ESC,  KC_1, KC_2, KC_3, KC_4, KC_5, KC_6, KC_7, KC_8, KC_9, KC_0, KC_MINS, KC_EQL, KC_BSPC,
    KC_TAB,  KC_Q, KC_W, KC_E, KC_R, KC_T, KC_Y, KC_U, KC_I, KC_O, KC_P, KC_LBRC, KC_RBRC, KC_BSLS,
    KC_CAPS, KC_A, KC_S, KC_D, KC_F, KC_G, KC_H, KC_J, KC_K, KC_L, KC_SCLN, KC_QUOT, KC_ENT,
    KC_LSFT, KC_Z, KC_X, KC_C, KC_V, KC_B, KC_N, KC_M, KC_COMM, KC_DOT, KC_SLSH, KC_RSFT, KC_UP,
    KC_LCTL, KC_LGUI, KC_LALT,               KC_SPC,                KC_RALT, KC_RGUI, KC_RCTL, KC_LEFT, KC_DOWN, KC_RGHT
  )
};
Re‑compile and flash the updated firmware (repeat Step 6). Now your custom layout is live.
Common Mistakes to Avoid
• **Using the wrong PCB size** – a 65% PCB won’t fit a 60% case. Verify dimensions before ordering.
• **Insufficient solder** – cold joints cause intermittent keypresses. Always heat the pad and pin simultaneously.
• **Forgetting stabilizers** – large keys will feel mushy or register double‑clicks without them.
• **Skipping firmware reset** – flashing without entering bootloader mode results in a failed flash.
• **Mismatched keycaps** – keycaps are sized for specific stem types (MX vs. Alps). Ensure compatibility.
Tips and Tricks
– **Use a helping hand** (PCB holder) to keep the board steady while soldering.
– **Pre‑tin all pins** before inserting switches; it speeds up soldering dramatically.
– **Test each row** with a multimeter before flashing to catch shorts early.
– **Try VIA** if you want live keymap changes without re‑flashing.
– **Lubricate switches** for smoother feel; apply a thin layer of Krytox 205g0 to stems and springs.
Frequently Asked Questions
Do I need to know how to code to build a keyboard?
No. The default QMK keymap works out of the box. Basic editing of the keymap file is all that’s required, and many resources provide copy‑and‑paste configurations.
Can I use hot‑swap sockets instead of soldering?
Absolutely. Hot‑swap PCBs let you plug switches directly, eliminating solder. They’re ideal for beginners who want to experiment with different switch types.
What if a key doesn’t register after flashing?
First, check the solder joint for a cold joint or bridge. Use a multimeter to verify continuity. If the hardware is sound, re‑flash the firmware and ensure the keycode in keymap.c matches the physical position.
Conclusion
Building a custom mechanical keyboard is a rewarding blend of hardware tinkering and software configuration. By following this beginner‑friendly roadmap—designing a layout, gathering parts, soldering, flashing QMK, and fine‑tuning your keymap—you’ll end up with a keyboard that’s uniquely yours. The skills you acquire also open the door to deeper customization, like RGB lighting, split keyboards, or ergonomic designs. Happy building, and enjoy every click of your new masterpiece!
Photo by JL Cabrera on Unsplash